Logan’s Take and Bake Rolls: Instructions
Craving warm, fluffy rolls at home? Logan’s Take and Bake rolls offer convenience. Follow these simple instructions for a delightful experience. Preheat your oven to 350°F (175°C) for best results.
Ordering Take and Bake Rolls
Ready to enjoy Logan’s Roadhouse rolls in the comfort of your own home? Ordering Take and Bake rolls is a simple process, designed for your convenience. First, check the Logan’s Roadhouse website for participating locations near you. Many locations offer online ordering, which streamlines the process and saves you time.
Navigate to the “Order Online” section of the website and select your preferred location. From there, browse the menu and locate the “Take and Bake Rolls” option. Specify the quantity you desire, keeping in mind that these rolls are often a crowd-pleaser, so it’s wise to order generously! Add the rolls to your cart and proceed to checkout.
During checkout, you’ll be prompted to select a pickup time that suits your schedule. Ensure you choose a time at least 24 hours in advance, as some locations require this lead time for Take and Bake orders. Confirm your order and payment details, and you’re all set! On the day of pickup, simply head to your chosen Logan’s Roadhouse location at the designated time and retrieve your Take and Bake rolls, ready to be baked to golden perfection at home.
Ingredients in Logan’s Rolls (Copycat)
To recreate the magic of Logan’s Roadhouse rolls at home, gathering the right ingredients is crucial. This copycat recipe aims to capture the signature soft texture and slightly sweet flavor that makes these rolls so irresistible. You’ll need all-purpose flour, the foundation of the dough, providing structure and chewiness. Active dry yeast is essential for leavening, giving the rolls their airy lightness.
A touch of sugar not only adds sweetness but also aids in activating the yeast. Salt balances the flavors and enhances the other ingredients. Nonfat dry milk powder contributes to the rolls’ tenderness and subtle milky taste. Water, warmed to the right temperature, is vital for hydrating the yeast and bringing the dough together.
Melted butter adds richness and flavor, while an egg contributes to the rolls’ soft texture and golden color. A hint of honey enhances the sweetness and adds a touch of floral aroma. Finally, have some extra melted butter on hand for brushing the rolls after baking, creating a beautiful sheen and irresistible buttery flavor. These ingredients, when combined with care, will help you bake a batch of copycat Logan’s Roadhouse rolls that are sure to impress.
Preparing the Dough
The first step to delicious, homemade Logan’s Roadhouse-style rolls is preparing the dough. Begin by activating the yeast. In a small bowl, combine warm water and sugar, then sprinkle the active dry yeast over the mixture. Let it stand for 5-10 minutes until foamy, indicating the yeast is active and ready to work its magic.
In a large mixing bowl, whisk together the all-purpose flour, salt, and nonfat dry milk powder. This ensures that these dry ingredients are evenly distributed. Create a well in the center of the dry ingredients and pour in the yeast mixture, melted butter, egg, and honey. Using a wooden spoon or a stand mixer fitted with a dough hook, begin to combine the wet and dry ingredients.
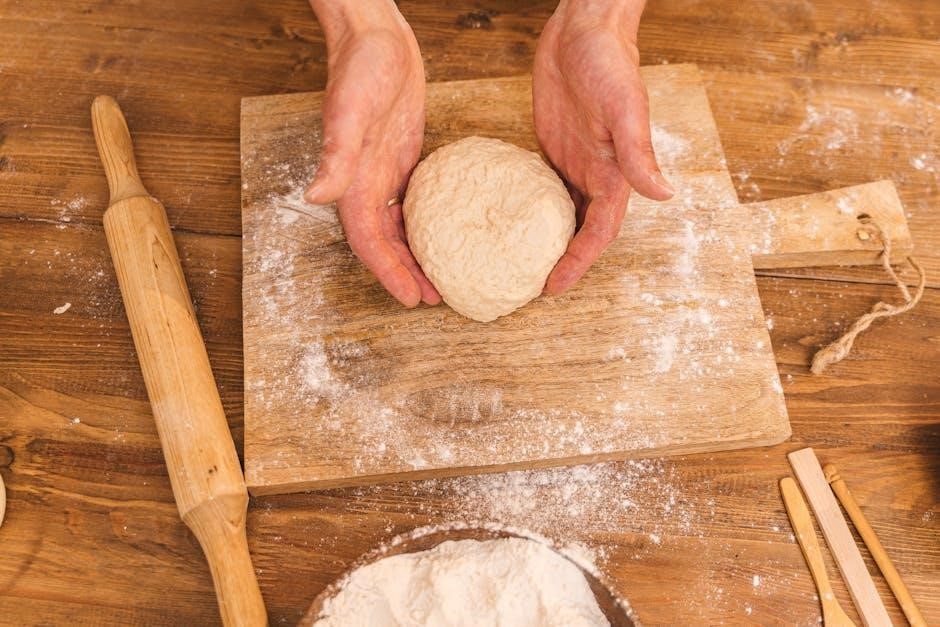
Mix until a shaggy dough forms. Turn the dough out onto a lightly floured surface and knead for 5-7 minutes, or until it becomes smooth and elastic. If using a stand mixer, knead with the dough hook for about 5 minutes. The dough should be slightly tacky but not sticky. Place the kneaded dough in a lightly oiled bowl, turning to coat all sides. This prevents the dough from drying out during the first rise.
Proofing the Dough: First Rise
After preparing the dough, the next crucial step is the first rise, also known as proofing. This process allows the yeast to work its magic, creating the light and airy texture characteristic of Logan’s Roadhouse rolls. Cover the bowl tightly with plastic wrap or a damp towel. This creates a warm, humid environment, ideal for yeast activity and prevents the dough from drying out.
Place the covered bowl in a warm, draft-free place. A slightly warmed oven (turned off!), a sunny spot, or even a microwave (not running!) can work well. Allow the dough to rise for approximately 1 to 1.5 hours, or until it has doubled in size. The exact time may vary depending on the temperature of your environment; warmer environments encourage faster rising. To test if the dough has risen sufficiently, gently poke it with two fingers. If the indentations remain, the dough is ready for the next step.

If the dough springs back quickly, it needs more time to rise. This first rise is critical for developing flavor and texture, so patience is key! Once doubled, gently punch down the dough to release the excess air. This prepares it for shaping into individual rolls.

Shaping the Rolls
Now that your dough has undergone its first rise, it’s time to shape it into those signature Logan’s Roadhouse rolls. Gently turn the dough out onto a lightly floured surface. This prevents sticking and makes it easier to handle. Use a rolling pin to gently roll the dough into a rectangle, about 1/2 inch thick. Don’t press too hard, as you want to maintain the airiness achieved during proofing.
Using a sharp knife or pizza cutter, cut the rectangle into evenly sized squares or rectangles. The size will determine the final size of your rolls, so aim for consistency. For a rustic look, you can simply cut irregular shapes. Next, gently shape each piece into a ball or oval. You can tuck the edges underneath to create a smooth top, or leave them slightly rough for a more artisanal appearance.
Grease a baking sheet or muffin tin. If using a baking sheet, arrange the rolls close together, allowing them to touch as they bake. This helps them retain moisture and creates soft sides. If using a muffin tin, place one roll in each cup. This will result in taller, more defined rolls. Cover the shaped rolls loosely with plastic wrap or a damp cloth and prepare for the second rise.
Proofing the Dough: Second Rise
After shaping your rolls, the second proofing, or rising, is crucial for achieving that light and airy texture characteristic of Logan’s Roadhouse rolls. This stage allows the yeast to further develop, creating gas that makes the dough expand and become incredibly soft. Find a warm, draft-free spot in your kitchen. A slightly warm oven (turned off!) or a sunny countertop works well.
Cover the shaped rolls loosely with either a damp, clean kitchen towel or lightly greased plastic wrap. This prevents the surface of the dough from drying out, which can inhibit rising. Allow the rolls to rise for approximately 30-60 minutes, or until they have nearly doubled in size. The exact time will depend on the temperature of your environment; warmer conditions will speed up the process.
Gently press the side of one of the rolls. If the indentation slowly springs back, they are ready to bake. Be careful not to over-proof, as this can cause the rolls to collapse during baking. Preheat your oven towards the end of the proofing time, ensuring it’s ready when the rolls have reached their desired size. This step prepares for the heat to make the rolls fluffy.
Baking Instructions: Temperature and Time
Achieving the perfect golden-brown hue and a fully cooked interior for your Logan’s Roadhouse-style rolls hinges on precise baking temperature and time. Preheat your oven to 400°F (200°C). This temperature allows the rolls to rise rapidly and develop a slightly crisp exterior while maintaining a soft and tender crumb inside. Ensure your oven is fully preheated before placing the rolls inside; this is critical for even baking.
Position the rolls on the middle rack of your oven to promote uniform heat distribution. Bake for approximately 12 to 18 minutes. Keep a close eye on them, as baking times can vary depending on your oven. The rolls are done when they are golden brown on top. A toothpick inserted into the center of a roll should come out clean. If the tops are browning too quickly, you can loosely tent them with foil to prevent burning.
Once baked, immediately remove the rolls from the oven. Brushing them with melted butter immediately after baking adds richness and shine, enhancing their flavor; Allowing them to cool slightly before serving will prevent burning your mouth and allow the flavors to meld together, readying them for consumption.
Honey-Butter Topping Application
The signature honey-butter topping is what elevates Logan’s Roadhouse rolls to a delectable treat. Applying it correctly is crucial for achieving that irresistible sweetness and moistness. Prepare your honey-butter while the rolls are baking so it’s ready immediately when they come out of the oven. A warm topping glides on easier and melts into the rolls more effectively.
Generously brush the honey-butter mixture over the tops of the freshly baked rolls. Don’t be shy; ensure each roll is thoroughly coated. The warmth of the rolls will help the honey-butter melt and seep into every crevice, infusing them with flavor. If you have any leftover honey-butter, consider brushing the rolls a second time after they’ve cooled slightly for an extra layer of sweetness.
For an even more decadent experience, you can gently poke small holes in the tops of the rolls before applying the honey-butter. This allows the topping to penetrate deeper into the rolls, creating a more intense flavor profile. Serve immediately and enjoy the sweet sensation of the honey-butter melting in your mouth!
Serving and Storage Instructions

Logan’s rolls are best enjoyed warm and fresh from the oven, maximizing their soft texture and delightful flavor. Serve them immediately after applying the honey-butter topping for the ultimate indulgence. These rolls pair wonderfully with a variety of dishes, from hearty soups and stews to grilled meats and salads, enhancing any meal with their comforting warmth and sweetness.
If you happen to have leftover rolls, proper storage is key to maintaining their quality. Allow the rolls to cool completely before storing them in an airtight container or a resealable plastic bag. At room temperature, they will stay fresh for up to two days. For longer storage, consider refrigerating them for up to five days. If you want to keep them even longer, freezing is an excellent option.
To freeze, wrap the cooled rolls individually in plastic wrap, then place them in a freezer-safe bag. Frozen rolls can last for up to two months. When ready to enjoy, thaw them at room temperature before reheating. Following these storage guidelines ensures you can savor the deliciousness of Logan’s rolls whenever the craving strikes.
Reheating Instructions

To recapture the fresh-baked taste and texture of your Logan’s rolls, proper reheating is essential. If the rolls have been stored at room temperature, preheat your oven to 350°F (175°C). Wrap the rolls loosely in aluminum foil to prevent them from drying out, and bake for about 10 minutes, or until they are warmed through. Check frequently to avoid overheating.
For refrigerated rolls, the reheating process is similar, but may require a slightly longer baking time. Preheat your oven to 350°F (175°C), wrap the rolls in foil, and bake for approximately 12-15 minutes, ensuring they are heated evenly throughout. Again, monitor them closely to prevent them from becoming too dry or hard.
If you’re reheating frozen rolls, allow them to thaw completely at room temperature first. Once thawed, follow the same reheating instructions as for refrigerated rolls, preheating the oven to 350°F (175°C), wrapping them in foil, and baking for 12-15 minutes. Alternatively, for a quicker method, you can use a microwave. Wrap each roll in a damp paper towel and microwave in 30-second intervals until warm, but be aware that this may alter the texture slightly. Enjoy your revitalized Logan’s rolls!
