
Assembling a greenhouse requires careful planning and adherence to instructions. This guide provides a step-by-step approach to ensure a successful and durable structure, optimizing plant growth conditions.
1.1 Importance of Following Instructions
Following the provided instructions is crucial for a successful greenhouse assembly. Properly assembling each component ensures the structure’s stability and safety. Deviating from the guidelines may lead to an unstable build, safety hazards, and potential damage. Additionally, failing to adhere to instructions can void warranties and compromise the greenhouse’s durability. Always follow the recommended steps to guarantee a secure and functional greenhouse.
1.2 Brief Overview of the Process
Greenhouse assembly involves several key steps, starting with site preparation and base construction. The frame is then built, followed by roof installation, door assembly, and glazing. Finally, vents and additional features are added. Each step requires precision to ensure structural integrity and proper functionality. Adhering to the sequence ensures a sturdy and weather-tight greenhouse, ready for planting and maintaining optimal growing conditions.
Preparation Before Assembly
Preparation is crucial for a smooth assembly process. Gather all tools and materials, verify the parts list, and evaluate the site. Ensure the ground is level, and construct a suitable base. Wear protective gear and organize components to avoid delays. Proper planning ensures efficiency and accuracy, setting the foundation for a successful greenhouse assembly.
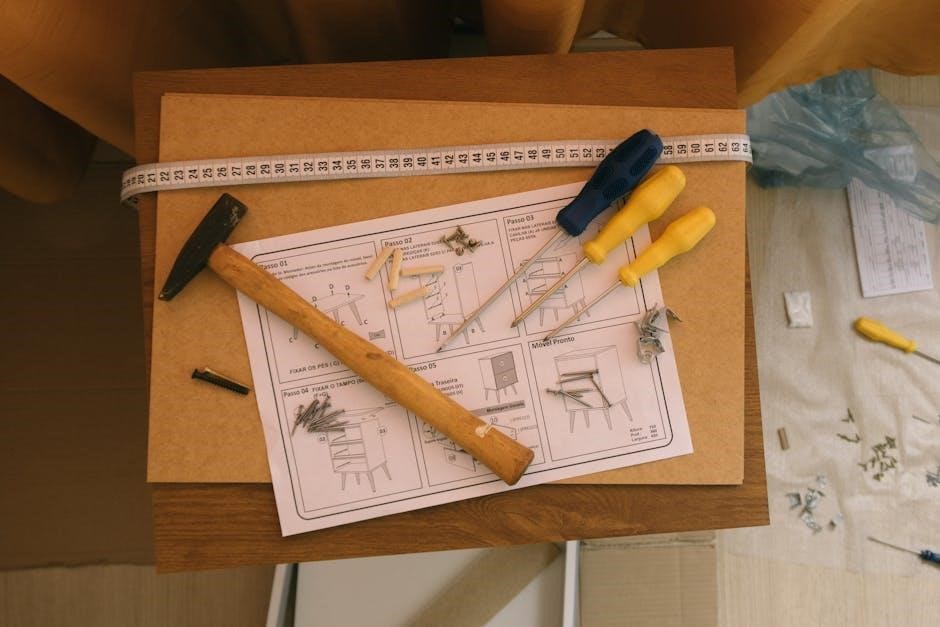
2.1 Tools and Materials Needed
Ensure you have essential tools: screwdrivers, wrenches, hammers, and drills. Materials include galvanized steel bases, bolts, screws, and weatherproof seals. Protective gear like gloves and safety glasses is recommended. Verify all components from the parts list are present. Organize tools and materials for easy access to streamline the assembly process and minimize delays. Proper preparation ensures efficiency and safety.
Examine the parts list to identify components like frames, panels, doors, and hardware. Cross-reference each part with its description to ensure accuracy. Familiarize yourself with quantities and specifications. This step prevents discrepancies and ensures all items are accounted for before starting assembly, avoiding delays and potential rework. Organize parts by category for efficient access. Choose a location with maximum sunlight and good drainage. Ensure the ground is level and clear of debris. Protect the area from strong winds for stability. Select a spot with maximum sunlight, good drainage, and protection from strong winds. Ensure proximity to water and electricity sources; Avoid shaded areas and tree roots to prevent damage and maintain structural integrity for optimal plant growth conditions. Clear the site of debris, vegetation, and obstructions. Ensure the ground is level using a spirit level and compact the soil firmly. Proper leveling prevents structural issues and ensures even weight distribution. A galvanized steel base is recommended for a stable foundation. Check drainage to avoid water pooling, which can damage the greenhouse over time. Construct a sturdy base frame using galvanized steel or durable wood. Ensure it matches your greenhouse size for proper alignment and stability. Secure it firmly to the ground to prevent shifting and provide a solid foundation for the structure. A level base is essential for the entire assembly process to proceed smoothly and safely. Secure the base frame to the ground using anchor kits or ground screws. Ensure the greenhouse is firmly fixed to prevent movement caused by wind or uneven settling. Follow the manufacturer’s instructions for anchor placement and tightening. This step is critical for stability and ensuring the structure can withstand external forces like strong winds or snow loads. Proper anchoring guarantees a safe and durable installation. Begin by assembling side frames, then attach front and back sections. Ensure all connections are secure and aligned properly for a rigid structure. Follow manufacturer instructions closely to achieve a stable frame, essential for withstanding environmental stresses and supporting roof and glazing components effectively. Proper frame assembly is crucial for the overall integrity of the greenhouse. Start by constructing the side frames using the provided bolts and connectors. Ensure all edges align properly and the frame is square. Tighten bolts firmly but avoid over-tightening until the entire frame is assembled. Use a spirit level to verify the frame’s accuracy. Work on a flat surface to maintain stability. Refer to the instruction manual for specific part numbers and assembly sequences. Wear protective gloves and sturdy footwear for safety. Attach the front and back sections to the side frames using the provided bolts and connectors. Ensure the sections align perfectly with the side frames and are secure. The front section typically includes the door frame, so position it correctly and tighten the bolts evenly. Double-check the alignment and squareness of the structure before moving forward. Refer to the instruction manual for specific hardware and sequence details. Align roof panels with the frame, ensuring proper fit and security. Attach panels using provided hardware, following the manual for precise instructions. Ensure structural integrity and weatherproofing for optimal performance. Position roof panels aligned with the frame, securing them using provided clips or screws. Ensure each panel fits snugly, following the manual’s step-by-step guide. Tighten all fasteners to prevent gaps, ensuring weatherproof sealing for durability and optimal performance. Work with a partner for easier handling of larger panels, maintaining structural integrity throughout the process. After attaching roof panels, double-check the frame’s stability. Tighten all bolts and screws firmly, ensuring the roof structure is solid. Use cross braces if provided to reinforce the frame against wind and snow loads. Apply weatherproof sealants around panel edges to prevent leaks, ensuring long-lasting durability and protection for your greenhouse environment. Assemble the door frame and attach it securely to the greenhouse structure. Ensure proper alignment and use provided hardware for a sturdy, weather-tight installation. Check fit and levelness before finalizing. Begin by identifying all door frame components. Attach hinges and handles to the door panels using screws. Align the frame sections and secure them with bolts. Ensure the frame is square and sturdy. Use a spirit level to confirm alignment. Tighten all connections firmly but avoid overtightening. Double-check the fit before proceeding to the next step. Attach the door hinges to the assembled door frame using the provided screws. Align the hinges with the door panels, ensuring proper orientation. Secure the handles to the door panels with bolts, placing them at equal distances for balanced operation. Mount the complete door assembly to the greenhouse frame, ensuring it is level and evenly aligned. Tighten all bolts firmly to ensure stability and smooth door operation. Install glass or polycarbonate panels securely into the frame, ensuring tight seals to prevent leaks. Use weatherproof sealants for durability and energy efficiency, following manufacturer guidelines for optimal results. Begin by carefully handling the panels to avoid damage. Apply a thin layer of weatherproof sealant around the frame edges. Gently fit the glass or polycarbonate panels into their designated slots, ensuring they align securely. Use the provided clips or frame connectors to hold them in place. Tighten all fasteners evenly to prevent warping. Inspect for any gaps or misalignments to ensure a proper seal. After installing the panels, inspect all edges and joints for gaps. Apply a bead of weatherproof sealant around panel edges and frame connections. Ensure rubber gaskets are properly seated to prevent leaks. Check door and vent seals for tightness. Inspect the entire structure for any gaps or weak points that could compromise weatherproofing. Proper sealing ensures energy efficiency and protects your greenhouse from moisture damage. Vents are crucial for temperature regulation. Install roof vents securely, ensuring proper alignment and tight seals. Add automatic vent openers to enhance temperature control and airflow efficiency. Roof vents are essential for maintaining optimal temperature and airflow. Ensure vents are evenly spaced and aligned properly. Attach vent frames securely, unscrew nuts, and fasten them to the roof structure. Openings should be smooth and unobstructed. Proper installation prevents overheating and ensures humidity control, promoting healthy plant growth. Automatic vent openers enhance climate control by regulating temperature without manual intervention. Attach the opener to the vent frame, ensuring proper alignment. Follow the manufacturer’s settings for temperature thresholds. Secure all screws tightly and test functionality. This system ensures vents open and close efficiently, maintaining ideal conditions for plant growth and reducing labor. After assembly, inspect all components for stability and alignment. Ensure vents, doors, and windows function smoothly. Verify secure fastening of panels and frames to withstand weather conditions effectively. Double-check every bolt and screw to ensure they are tightly secured. Use a wrench or screwdriver to tighten any loose connections. Properly tightened fasteners prevent structural weakness and damage from wind or snow loads. Avoid overtightening, which could strip threads or warp metal components. This step is crucial for the stability and longevity of your greenhouse. After assembly, inspect the greenhouse for any gaps or damage. Check all panels, frames, and vents for proper alignment and seals. Ensure no leaks or drafts are present. Address any issues immediately to prevent structural compromise. Use sealants for minor gaps and replace damaged panels if necessary. This step ensures the greenhouse remains weatherproof and secure for years to come. Regular maintenance ensures the longevity and functionality of your greenhouse. Clean surfaces, inspect for damage, and prepare for seasonal changes to maintain optimal growing conditions. Regular cleaning involves removing dirt and debris from glass or polycarbonate panels to maintain light transparency. Inspect frames and joints for wear or damage. Replace any broken or worn-out parts promptly. Ensure all vents and doors function smoothly for proper ventilation and temperature regulation. Cleaning and inspections should be done at least once a month, or more frequently during harsh weather conditions. For winter, clear snow from the roof to prevent structural damage and ensure proper ventilation. Insulate the frame and consider using thermal covers. In summer, focus on ventilation by opening vents and shading the greenhouse to avoid overheating. Regularly inspect and clean vents to maintain airflow efficiency during both seasons, ensuring optimal growing conditions year-round. Identify and address leaks, drafts, or damaged panels promptly. Regular inspections and repairs ensure structural integrity and optimal growing conditions. Refer to the manual for specific solutions. Inspect the greenhouse for gaps or cracks, especially around panel edges and vents. Reapply sealants or weatherproofing materials to ensure airtight conditions. Check gaskets and hinges for proper alignment. Secure all bolts and screws tightly, as loose fasteners can cause drafts. Regularly inspect the roof and walls for damage or wear. Use rubber gaskets to reinforce seals where necessary. For damaged panels, replace them with new ones, ensuring a secure fit. Clean the frame area before installing replacement panels. If the frame is bent or warped, straighten it gently or replace the section. Apply weatherproof sealant to reinforce joints. Tighten all bolts and screws to maintain structural integrity. Regular inspections during seasonal changes can prevent further damage and ensure optimal performance. Completing your greenhouse assembly successfully requires patience and attention to detail. Proper assembly ensures durability and optimal growing conditions. Refer to provided resources for future maintenance and support. The greenhouse assembly process involves careful preparation, precise framing, and secure installation of panels and vents. Start with site selection and base construction, followed by frame assembly, glazing, and final checks. Adhere to instructions for a sturdy and functional greenhouse. Proper execution ensures durability and optimal growing conditions for plants. Seek assistance if needed, and always follow safety guidelines. With your greenhouse assembled, focus on creating an ideal environment for your plants. Ensure proper watering, ventilation, and temperature control. Regular maintenance and seasonal adjustments will promote healthy growth. By following the instructions and caring for your greenhouse, you’ll enjoy a thriving garden year-round. Happy growing! Downloadable manuals, manufacturer support, and help lines are available for guidance. Visit websites like Halls Greenhouses or contact their support team for assistance. Access comprehensive PDF manuals for various greenhouse models on manufacturer websites. Manuals include detailed assembly steps, diagrams, and parts lists. Popular ranges like Halls and Robinsons offer downloadable guides. These resources ensure clarity and ease during assembly, covering models such as 6×4, 6×6, and 6×8 greenhouses. Visit the Greenhouse People site for additional resources. Manufacturers provide dedicated support for greenhouse assembly. Contact Halls Greenhouses or Robinsons for assistance. Summer Garden Buildings offers free advice at 0800 9777 828. These resources ensure guidance is available for pre-purchase inquiries and assembly issues, helping you achieve a successful greenhouse setup. Always wear protective gloves and sturdy footwear when handling glass or sharp objects. Ensure the greenhouse is secured against strong winds and snow loads to prevent damage or collapse. Always wear protective gloves and sturdy footwear when assembling your greenhouse. This ensures safety while handling sharp or heavy materials. Protective gear prevents injuries from glass, metal edges, or accidental tool mishaps, making it essential for a safe assembly process. Always wear protective gloves and eyewear when handling glass or sharp objects. Lift glass panels carefully, avoiding sudden movements. Inspect for damages before installation. Store sharp tools securely to prevent accidents. Handle metal frames with caution to avoid cuts. Proper handling ensures a safe assembly process and prevents damage to greenhouse components. Anchor the greenhouse firmly to withstand wind and snow. Use galvanized screws or ground anchors to ensure stability and prevent structural damage from harsh weather conditions. Properly anchoring your greenhouse is crucial to resist strong winds. Use galvanized steel bases and ground anchors to secure the structure. Ensure the base is level and tightly fastened to the ground. This prevents uplift and ensures stability, protecting your greenhouse from wind damage and maintaining its structural integrity throughout the year. Regularly clear snow exceeding 2 inches from your greenhouse roof to prevent structural damage. Ensure the frame is sturdy and properly assembled to withstand weight. Use durable materials like polycarbonate panels for added strength. Failure to maintain snow removal can lead to frame distortion or collapse, compromising the greenhouse’s integrity and safety.2.2 Understanding the Parts List
Site Selection and Preparation
3.1 Choosing the Right Location
3.2 Clearing and Leveling the Ground
Base Assembly
4.1 Constructing the Base Frame
4.2 Anchoring the Base to the Ground

Frame Assembly
5.1 Assembling the Side Frames
5.2 Constructing the Front and Back Sections

Roof Assembly
6.1 Attaching Roof Panels
6.2 Securing the Roof Frame

Door Installation
7.1 Assembling the Door Frame
7.2 Mounting the Door and Handles
Glazing the Greenhouse
8.1 Installing Glass or Polycarbonate Panels
8.2 Ensuring Weatherproof Seals
Vent Installation
9.1 Adding Roof Vents
9.2 Installing Automatic Vent Openers
Final Assembly Checks
10.1 Tightening All Bolts and Screws
10.2 Inspecting for Gaps or Damage
Maintenance and Upkeep
11.1 Regular Cleaning and Inspections
11.2 Seasonal Preparations (Winter, Summer)

Troubleshooting Common Issues
12.1 Addressing Leaks or Drafts
12.2 Repairing Damaged Panels or Frames
13.1 Summarizing the Assembly Process
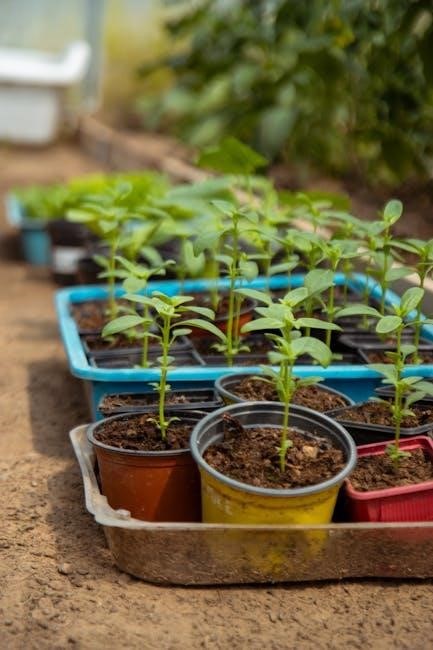
13.2 Encouragement for Successful Growing
Additional Resources
14.1 Downloadable Instruction Manuals
14.2 Manufacturer Support and Help Lines

Safety Precautions
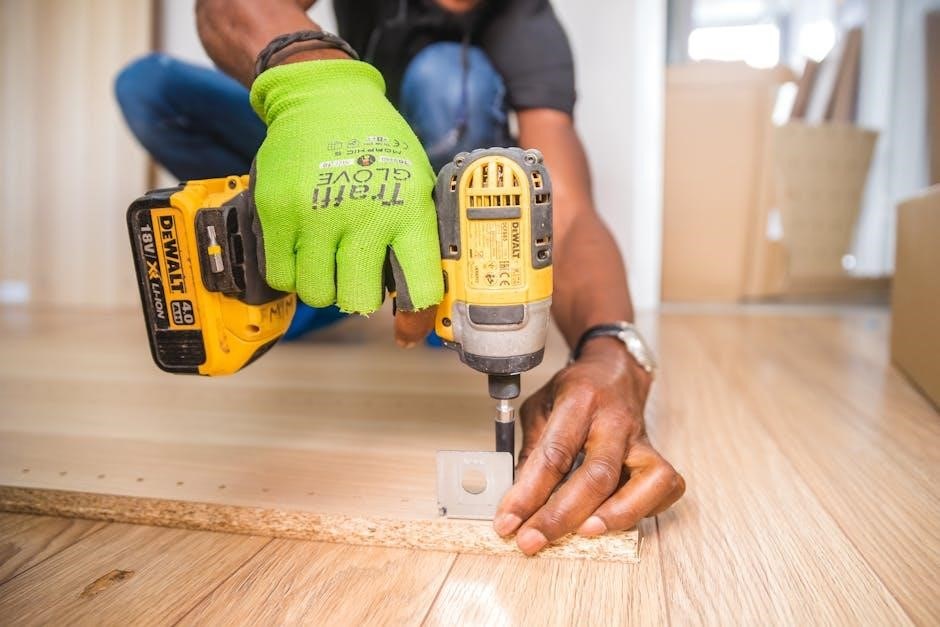
15.1 Wearing Protective Gear
15.2 Handling Glass and Sharp Objects
Securing the Greenhouse
16.1 Anchoring Against Wind
16.2 Protecting from Snow Load